Getting Started
NOTE: TT-Torch is deprecated. To work with PyTorch and the various features available in TT-Torch, please see the documentation for TT-XLA.
This document walks you through how to set up TT-Torch. TT-Torch is TT-Forge's front end for converting PyTorch models to different levels of Intermediate Representation (IR) all the way down to TTNN. This is the main Getting Started page. There are two additional Getting Started pages depending on what you want to do. They are all described here, with links provided to each.
The following topics are covered:
- Setup Options
- Configuring Hardware
- Installing a Wheel and Running an Example
- Other Setup Options
- Where to Go Next
NOTE: If you encounter issues, please request assistance on the TT-Torch Issues page.
Setup Options
TT-Torch can be used to run PyTorch models. Because TT-Torch is open source, you can also develop and add features to it. Setup instructions differ based on the task. You have the following options, listed in order of difficulty:
- Installing a Wheel and Running an Example - You should choose this option if you want to run models.
- Using a Docker Container to Run an Example - Choose this option if you want to keep the environment for running models separate from your existing environment.
- Building from Source - This option is best if you want to develop TT-Torch further. It's a more complex process you are unlikely to need if you want to stick with running a model.
Configuring Hardware
Before setup can happen, you must configure your hardware. You can skip this section if you already completed the configuration steps. Otherwise, this section of the walkthrough shows you how to do a quick setup using TT-Installer.
-
Configure your hardware with TT-Installer using the Quick Installation section here.
-
Reboot your machine.
-
Make sure hugepages is enabled:
sudo systemctl enable --now 'dev-hugepages\x2d1G.mount'
sudo systemctl enable --now tenstorrent-hugepages.service
-
Please ensure that after you run the TT-Installer script, after you complete reboot and set up hugepages, you activate the virtual environment it sets up -
source ~/.tenstorrent-venv/bin/activate. -
After your environment is running, to check that everything is configured, type the following:
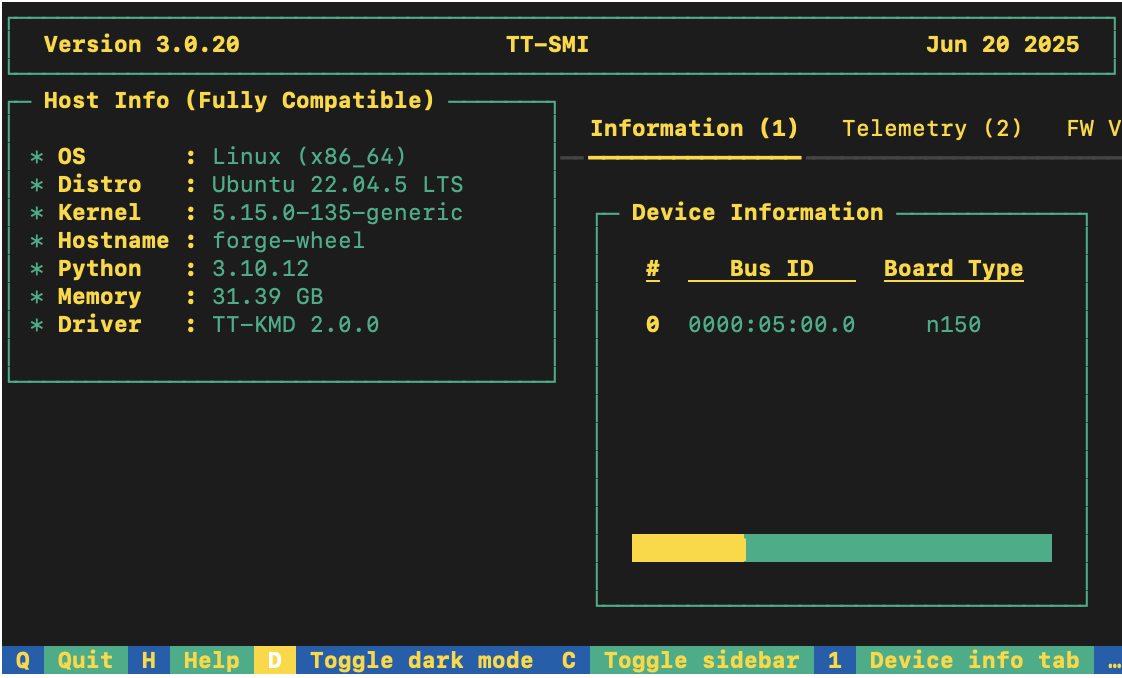
tt-smi
You should see the Tenstorrent System Management Interface. It allows you to view real-time stats, diagnostics, and health info about your Tenstorrent device.
Installing a Wheel and Running an Example
This section walks you through downloading and installing a wheel. You can install the wheel wherever you would like if it is for running a model. For this walkthrough, the resnet50_demo.py demo is used.
- Make sure you are in an active virtual environment. This walkthrough uses the same environment you activated to look at TT-SMI in the Configuring Hardware section. If you are using multiple TT-Forge front ends to run models, you may want to set up a separate virtual environment instead. For example:
python3 -m venv .tt-torch-venv
source .tt-torch-venv/bin/activate
- Download and install the wheel in your active virtual environment:
pip install tt-torch --pre --extra-index-url https://pypi.eng.aws.tenstorrent.com/
- Before you run a model, download and install the MPI implementation:
wget -q https://github.com/dmakoviichuk-tt/mpi-ulfm/releases/download/v5.0.7-ulfm/openmpi-ulfm_5.0.7-1_amd64.deb -O /tmp/openmpi-ulfm.deb && \
sudo apt install -y /tmp/openmpi-ulfm.deb
- Install the other packages you need for the demo:
pip install pillow
pip install tabulate
pip install requests
- Clone the TT-Forge repo:
git clone https://github.com/tenstorrent/tt-forge.git
-
Navigate into tt-forge/demos/tt-torch. You are now ready to try running a model.
-
Run the demo:
python resnet50_demo.py
If all goes well, you should get a list of top five predictions for what the example image is, with the top one being a cat.
Other Setup Options
If you want to keep your environment completely separate in a Docker container, or you want to develop TT-Torch further, this section links you to the pages with those options:
Where to Go Next
Now that you have set up the TT-Torch wheel, you can compile and run other demos. See the TT-Torch folder in the TT-Forge repo for other demos you can try.