Introduction
The TT-Forge FE is a graph compiler designed to optimize and transform computational graphs for deep learning models on single-chip systems, enhancing their performance and efficiency.
Built on top of the TT-MLIR backend, TT-Forge FE is an integral component of the TT-Forge project, which provides a comprehensive suite of tools for optimizing and deploying deep learning models on Tenstorrent hardware.
The main project goals are:
- Provide abstraction of many different frontend frameworks (PyTorch, TensorFlow, ONNX, etc.)
- Compile many kinds of model architectures without custom modification and with great performance (for example, Transformers, CNNs, etc.)
- Abstract all Tenstorrent device architectures (for example, Wormhole, Blackhole, etc.)
Getting Started
This document walks you through how to set up TT-Forge-FE. This is the main Getting Started page. There are two additional Getting Started pages depending on what you want to do. They are all described here, with links provided to each.
NOTE: TT-Forge-FE is a framework agnostic frontend that can convert any model to a generic Intermediate Representation (IR) that can then be converted to a Tenstorrent specific IR for use with Tenstorrent hardware. TT-Forge-FE is for use with single-chip systems only.
The following topics are covered:
- Setup Options
- Configuring Hardware
- Installing a Wheel and Running an Example
- Other Setup Options
- Where to Go Next
NOTE: If you encounter issues, please request assistance on the TT-Forge-FE Issues page.
Setup Options
TT-Forge-FE can be used to run models from any framework. Because TT-Forge-FE is open source, you can also develop and add features to it. Setup instructions differ based on the task. You have the following options, listed in order of difficulty:
- Installing a Wheel and Running an Example - You should choose this option if you want to run models.
- Using a Docker Container to Run an Example - Choose this option if you want to keep the environment for running models separate from your existing environment.
- Building from Source - This option is best if you want to develop TT-Forge-FE further. It's a more complex process you are unlikely to need if you want to stick with running a model.
Configuring Hardware
Before setup can happen, you must configure your hardware. You can skip this section if you already completed the configuration steps. Otherwise, this section of the walkthrough shows you how to do a quick setup using TT-Installer.
-
Configure your hardware with TT-Installer using the Quick Installation section here.
-
Reboot your machine.
-
Make sure hugepages is enabled:
sudo systemctl enable --now 'dev-hugepages\x2d1G.mount'
sudo systemctl enable --now tenstorrent-hugepages.service
-
Please ensure that after you run the TT-Installer script, after you complete reboot and set up hugepages, you activate the virtual environment it sets up -
source ~/.tenstorrent-venv/bin/activate. -
After your environment is running, to check that everything is configured, type the following:
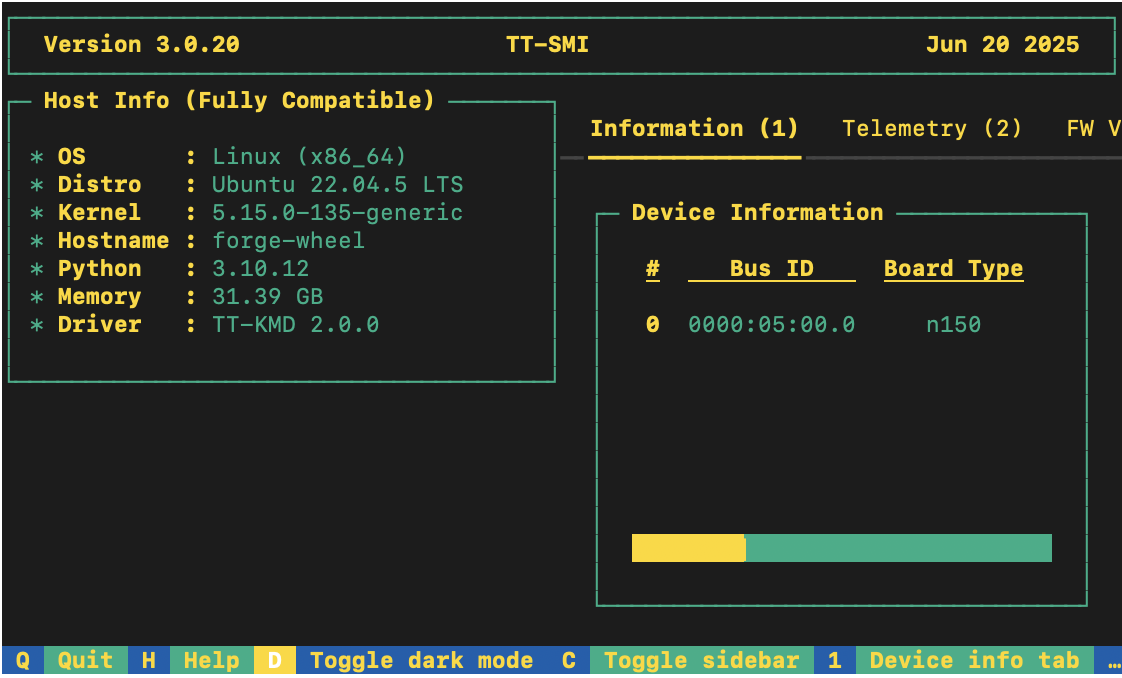
tt-smi
You should see the Tenstorrent System Management Interface. It allows you to view real-time stats, diagnostics, and health info about your Tenstorrent device.
Installing a Wheel and Running an Example
This section walks you through downloading and installing a wheel. You can install the wheel wherever you would like.
-
Make sure you are in an active virtual environment. This walkthrough uses the same environment you activated to look at TT-SMI in the Configuring Hardware section.
-
For this walkthrough, TT-Forge-FE is used. You need to install the tt_forge wheel:
pip install tt_forge --extra-index-url https://pypi.eng.aws.tenstorrent.com/
- Before you run a model, download and install the MPI implementation:
wget -q https://github.com/dmakoviichuk-tt/mpi-ulfm/releases/download/v5.0.7-ulfm/openmpi-ulfm_5.0.7-1_amd64.deb -O /tmp/openmpi-ulfm.deb && \
sudo apt install -y /tmp/openmpi-ulfm.deb
- To test that everything is running correctly, try an example model. You can use nano or another text editor to paste this code into a file named forge_example.py and then run it from the terminal. You should still have your virtual environment running after installing the wheel when running this example:
import torch
import forge

class Add(torch.nn.Module):
  def __init__(self):
    super().__init__()

  def forward(self, a, b):
    return a + b

a = torch.rand(size=(2, 32, 32))
b = torch.rand(size=(2, 32, 32))

framework_module = Add()
compiled_model = forge.compile(framework_module, sample_inputs=[a, b])

out = compiled_model(a, b)

print("compiled output:", out)
- You have now set up the latest wheel for TT-Forge-FE, and can run any models you want inside your virtual environment.
Other Set up Options
If you want to keep your environment completely separate in a Docker container, or you want to develop TT-Forge-FE further, this section links you to the pages with those options:
- Setting up a Docker Container - keep everything for running models in a container
- Building from Source - set up so you can develop TT-Forge-FE
Where to Go Next
Now that you have set up TT-Forge-FE, you can compile and run other demos or your own code. See the TT-Forge-FE folder in the TT-Forge repo for more demo options.
Getting Started with Docker
This document walks you through how to set up TT-Forge-FE using a Docker image. There are two other available options for getting started:
- Installing a Wheel - if you do not want to use Docker, and prefer to use a virtual environment by itself instead, use this method.
- Building from Source - if you plan to develop TT-Forge-FE further, you must build from source, and should use this method.
NOTE: TT-Forge-FE is a framework agnostic frontend that can convert any model to a generic Intermediate Representation (IR) that can then be converted to a Tenstorrent specific IR for use with Tenstorrent hardware. TT-Forge-FE is for use with single-chip systems only.
The following topics are covered:
NOTE: If you encounter issues, please request assistance on the TT-Forge-FE Issues page.
Configuring Hardware
Before setup can happen, you must configure your hardware. You can skip this section if you already completed the configuration steps. Otherwise, this section of the walkthrough shows you how to do a quick setup using TT-Installer.
-
Configure your hardware with TT-Installer using the Quick Installation section here.
-
Reboot your machine.
-
Make sure hugepages is enabled:
sudo systemctl enable --now 'dev-hugepages\x2d1G.mount'
sudo systemctl enable --now tenstorrent-hugepages.service
-
Please ensure that after you run the TT-Installer script, after you complete reboot and set up hugepages, you activate the virtual environment it sets up -
source ~/.tenstorrent-venv/bin/activate. -
When your environment is running, to check that everything is configured, type the following:
tt-smi
You should see the Tenstorrent System Management Interface. It allows you to view real-time stats, diagnostics, and health info about your Tenstorrent device.
- You can now deactivate the virtual environment.
Setting up the Docker Container
This section walks through the installation steps for using a Docker container for your project.
To install, do the following:
- Install Docker if you do not already have it:
sudo apt update
sudo apt install docker.io -y
sudo systemctl start docker
sudo systemctl enable docker
- Test that Docker is installed:
docker --version
- Add your user to the Docker group:
sudo usermod -aG docker $USER
newgrp docker
- Run the Docker container:
docker run -it --rm \
  --device /dev/tenstorrent \
  -v /dev/hugepages-1G:/dev/hugepages-1G \
  ghcr.io/tenstorrent/tt-forge-slim:latest
NOTE: You cannot isolate devices in containers. You must pass through all devices even if you are only using one. You can do this by passing
--device /dev/tenstorrent. Do not try to pass--device /dev/tenstorrent/1or similar, as this type of device-in-container isolation will result in fatal errors later on during execution.
- If you want to check that it is running, open a new tab with the Same Command option and run the following:
docker ps
- To check that everything is running as expected, try an example model. You can use nano or another text editor to paste this code into a file named forge_example.py and then run it from the terminal:
import torch
import forge

class Add(torch.nn.Module):
  def __init__(self):
    super().__init__()

  def forward(self, a, b):
    return a + b

a = torch.rand(size=(2, 32, 32))
b = torch.rand(size=(2, 32, 32))

framework_module = Add()
compiled_model = forge.compile(framework_module, sample_inputs=[a, b])

out = compiled_model(a, b)

print("compiled output:", out)
- If all goes well, you are now ready to move on to the next section, and run your first demo model.
Running Models in Docker
This section shows you how to run a model using Docker. The provided example is from the TT-Forge repo. Do the following:
- Inside your running Docker container, clone the TT-Forge repo:
git clone https://github.com/tenstorrent/tt-forge.git
- Set the path for Python:
export PYTHONPATH=/tt-forge:$PYTHONPATH
- Navigate into TT-Forge and run the following command:
git submodule update --init --recursive
-
Navigate back out of the TT-Forge directory.
-
For this set up, the mobile_netv2_demo.py is used. Navigate into tt-forge and run the following command:
python demos/tt-forge-fe/cnn/mobile_netv2_demo.py
- If all goes well you will get a prediction stating the best guess for what the image is, and the probability that the model identified the image correctly.
Where to Go Next
Now that you have set up TT-Forge-FE, you can compile and run your own models. See the TT-Forge-FE folder in the TT-Forge repo for more demo options.
For a quick start about how to compile a model, here is a code sample. Note the introduction of the forge.compile call:
import torch
from transformers import ResNetForImageClassification

def resnet():
    # Load image, pre-process, etc.
    ...

    # Load model (e.g. from HuggingFace)
    framework_model = ResNetForImageClassification.from_pretrained("microsoft/resnet-50")

    # Compile the model using Forge
    compiled_model = forge.compile(framework_model, input_image)

    # Run compiled model
    logits = compiled_model(input_image)

    ...
    # Post-process output, return results, etc.
Getting Started with Building from Source
This document describes how to build the TT-Forge-FE project on your local machine. You must build from source if you want to develop for TT-Forge-FE. If you only want to run models, please choose one of the following sets of instructions instead:
- Installing a Wheel and Running an Example - You should choose this option if you want to run models.
- Using a Docker Container to Run an Example - Choose this option if you want to keep the environment for running models separate from your existing environment.
NOTE: TT-Forge-FE is a framework agnostic frontend that can convert any model to a generic Intermediate Representation (IR) that can then be converted to a Tenstorrent specific IR for use with Tenstorrent hardware. TT-Forge-FE is for use with single-chip systems only.
The topics covered in this document are:
- Configuring Your Hardware
- Prerequisites
- Building the Environment
- Building the Docs
- Build Cleanup
- Useful Build Environment Variables
NOTE: If you encounter issues, please request assistance on the TT-Forge-FE Issues page.
Configuring Your Hardware
If you already configured your hardware, you can skip this section. Otherwise do the following:
-
Configure your hardware with TT-Installer using the Quick Installation section here.
-
Reboot your machine.
-
Please ensure that after you run this script, after you complete reboot, you activate the virtual environment it sets up -
source ~/.tenstorrent-venv/bin/activate. -
After your environment is running, to check that everything is configured, type the following:
tt-smi
You should see the Tenstorrent System Management Interface. It allows you to view real-time stats, diagnostics, and health info about your Tenstorrent device.
Prerequisites
The prerequisites for building TT-Forge-FE from souce are:
- Clang 17
- Ninja
- CMake (latest)
- Python 3.11
On Ubuntu 22.04 systems, you can install these dependencies using the following commands:
# Update package list
sudo apt update -y
sudo apt upgrade -y
Installing Clang
To install Clang if you do not have it already, use the following command:
wget https://apt.llvm.org/llvm.sh
chmod u+x llvm.sh
sudo ./llvm.sh 17
sudo apt install -y libc++-17-dev libc++abi-17-dev
sudo ln -s /usr/bin/clang-17 /usr/bin/clang
sudo ln -s /usr/bin/clang++-17 /usr/bin/clang++
You can check the version afterwards with these commands:
clang --version
clang++ --version
If you already have Clang installed and need to choose the appropriate version, you can use these commands:
sudo update-alternatives --install /usr/bin/clang
clang /usr/bin/clang-17 100
sudo update-alternatives --install /usr/bin/clang++
clang++ /usr/bin/clang++-17 100
Installing Ninja
Install Ninja with the following command:
sudo apt install ninja-build
Checking Python Version
Make sure you have Python 3.11 installed:
python3 --version
If you do not have Python 3.11 installed:
sudo apt install python3.11
Installing CMake
Install CMake and check the version with the following commands:
pip install cmake
Check that it installed:
cmake --version
Installing Additional Dependencies
This section goes over additional required dependencies. You may wish to check if you already have them installed before running installation steps for each item. Run the following commands:
- Install the required development packages:
sudo apt install -y \
    g++ \
    libstdc++-12-dev \
    libgmock-dev \
    libnuma-dev \
    libhwloc-dev \
    doxygen \
    libboost-container-dev
- Download and install the MPI implementation:
wget -q https://github.com/dmakoviichuk-tt/mpi-ulfm/releases/download/v5.0.7-ulfm/openmpi-ulfm_5.0.7-1_amd64.deb -O /tmp/openmpi-ulfm.deb && \
sudo apt install -y /tmp/openmpi-ulfm.deb
- Export environment variables:
export PATH=/opt/openmpi-v5.0.7-ulfm/bin:$PATH
export LD_LIBRARY_PATH=/opt/openmpi-v5.0.7-ulfm/lib:$LD_LIBRARY_PATH
Building the Environment
This is a one off step to build the toolchain and create a virtual environment for TT-Forge-FE. Generally, you need to run this step only once, unless you want to update the toolchain. Since TT-Forge-FE uses TT-MLIR, this step also builds the TT-MLIR environment (toolchain).
- First, it's required to create toolchain directories. The proposed example creates directories using the default paths. You can change the paths if you want to use different locations (see the Useful Build Environment Variables section below).
# FFE related toolchain (dafault path)
sudo mkdir -p /opt/ttforge-toolchain
sudo chown -R $USER /opt/ttforge-toolchain

# MLIR related toolchain (default path)
sudo mkdir -p /opt/ttmlir-toolchain
sudo chown -R $USER /opt/ttmlir-toolchain
- Clone the TT-Forge-FE repo:
git clone https://github.com/tenstorrent/tt-forge-fe.git
-
Navigate into the TT-Forge-FE repo.
-
Initialize required env variables:
source env/activate
NOTE: You will not see a virtual environment start from this command. That is expected behavior.
- Initialize and update submodules:
sudo git submodule update --init --recursive -f
- Build the environment:
cmake -B env/build env
cmake --build env/build
Expert Tip: If you already have the TT-MLIR toolchain built, you can use the
TTFORGE_SKIP_BUILD_TTMLIR_ENVoption to skip rebuilding the TT-MLIR environment (toolchain) to save time. Like so:cmake -B env/build env -DTTFORGE_SKIP_BUILD_TTMLIR_ENV=ON cmake --build env/buildNOTE: Special care should be taken to ensure that the already built TT-MLIR environment (toolchain) version is compatible with the one TT-Forge-FE is using.
- Activate the virtual environment for TT-Forge-FE. (This time when you run the command, you should see a running virtual environment):
source env/activate
- Build the TT-Forge-FE environment:
cmake -G Ninja -B build -DCMAKE_CXX_COMPILER=clang++-17 -DCMAKE_C_COMPILER=clang-17
cmake --build build
NOTE: Tenstorrent's official compiler is Clang 17.
If you want to try other compilers, while they are not tested, you can do so by changing the
-DCMAKE_CXX_COMPILERand-DCMAKE_C_COMPILERoptions.
You can pass additional options to the cmake command to customize the build. For example, to build everything in debug mode, you can run:
cmake -G Ninja -B build -DCMAKE_BUILD_TYPE=Debug -DCMAKE_CXX_COMPILER=clang++-17 -DCMAKE_C_COMPILER=clang-17
cmake --build build
List of commonly used options:
-DCMAKE_BUILD_TYPE=Debug|Release- Build type (Debug, Release)-DCMAKE_CXX_COMPILER_LAUNCHER=ccache- Useccacheto speed up re-builds-DTTMLIR_RUNTIME_DEBUG=ON|OFF- Build runtime debug tools (more logging, debug environment flags)
Incremental Building
If you have made changes to the C++ sources (of the TT-Forge-FE compiler, TT-MLIR or TT-Metal), you might want to do an incremental build to save time. This can be done by running the following command:
# If you are not already inside the virtual environment, activate it
source env/activate

cmake --build build -- install_ttforge
This will build TT-Forge-FE C++ sources and the dependencies (TT-MLIR, TT-Metal) and install them in the virtual environment.
Building the Docs
To build documentation, mdBook is required, see the installation guide here.
After installing mdBook, run the following commands to build and serve the documentation:
source env/activate
cmake --build build -- docs

# Serve the documentation
mdbook serve build/docs
Note:
mdbook servewill by default create a local server athttp://localhost:3000.
Note: For a custom port, specify the
-pattribute.
E.g.mdbook serve build/docs -p 5005, and visithttp://localhost:5005.
Build Cleanup
To ensure a clean build environment, follow these steps to remove existing build artifacts:
-
Remove TT-Forge-FE build artifacts:
rm -rf buildNOTE: This command removes the
builddirectory and all its contents, effectively cleaning up the build artifacts specific to tt-forge-fe. -
Clean all TT-Forge-FE build artifacts:
./clean_build.shNOTE: This script executes a comprehensive cleanup, removing all build artifacts across the entire Forge project, ensuring a clean slate for subsequent builds.
NOTE: The
clean_build.shscript will not clean toolchain (LLVM) build artifacts and dependencies. -
Clean everything (including the environment):
./clean_build.sh
rm -rf env/build third_party/tt-mlir/env/build
NOTE: This should rarely be needed, as it removes the entire build and environment (consequently entire toolchain will need to be rebuilt).
Useful Build Environment Variables
This section goes over some useful environment variables for use with the Building the Environment section.
TTMLIR_TOOLCHAIN_DIR- Specifies the directory where TTMLIR dependencies will be installed. Defaults to/opt/ttmlir-toolchainif not defined.TTMLIR_VENV_DIR- Specifies the virtual environment directory for TTMLIR. Defaults to/opt/ttmlir-toolchain/venvif not defined.TTFORGE_TOOLCHAIN_DIR- Specifies the directory where tt-forge dependencies will be installed. Defaults to/opt/ttforge-toolchainif not defined.TTFORGE_VENV_DIR- Specifies the virtual environment directory for tt-forge. Defaults to/opt/ttforge-toolchain/venvif not defined.TTFORGE_PYTHON_VERSION- Specifies the Python version to use. Defaults topython3.11if not defined.
Architecture Overview
TT-Forge is a comprehensive compiler designed to facilitate the development and optimization of machine learning models. It encompasses various components, each serving a specific purpose in the compiling and running machine learning pipelines. This document provides an overview of the key components with focus on TT-Forge-FE.
Table of contents
TT-Forge Overview

TT-TVM Overview

TVM IR
Coming soon!
TVM Compile
Coming soon!
Relay Compile Passes
Coming soon!
Forge Compile Passes
Coming soon!
Partition Graph
Coming soon!
Construct Inputs, Constants and Ops
Coming soon!
Generate Forge-FE Module
Coming soon!
Standalone Forge-FE Module
Coming soon!
TT-Forge-FE Overview

Initialize Compile
Coming soon!
Generate Initial Graph (TT-TVM)
Coming soon!
Post Initial Graph passes
Coming soon!
Consteval
Coming soon!
Autograd
Coming soon!
Post Autograd
Coming soon!
Pre Lowering
Coming soon!
Graph Split
Coming soon!
Compiler TTIR
Coming soon!
Output Binary
Coming soon!
Testing
This page describes how to run different kinds of tests in the tt-forge-fe project. If you haven't built the project yet,
please refer to the Build page.
Unit tests
To build the unit tests, run the following command:
cmake --build build -- build_unit_tests
To run the unit tests (this will also build the tests if they are not built):
cmake --build build -- run_unit_tests
Note: The unit tests are built in the
build/forge/csrc/testdirectory. From there, you can run targeted tests directly.
- For example, to run all the tests defined in
forge/csrc/test/passes/use:./build/forge/csrc/test/test_passes- You can further filter the tests by using the
--gtest_filterflag:./build/forge/csrc/test/test_passes --gtest_filter=MMFuseBias/MMFuseBias.mm_fuse_bias/3
End to end tests
For running the end-to-end tests we use the pytest framework. To run these tests, you need to be on a machine with a Tenstorrent
Wormhole device. Also, we are still in the process of cleaning up the old tests, so not all tests are working. For a list of green
tests, consult pytest.ini.
Note: Make sure that you have activated the python environment before running the tests.
To run all tests defined in /test/mlir/test_ops.py use:
pytest -svv forge/test/mlir/test_ops.py
To run a specific test, use the following:
pytest -svv forge/test/mlir/test_ops.py::test_add
- The
-svvflag is optional and used to display more information about the test run.
Single operator E2E tests
Single operator E2E tests consists of pre configured collections of in-depth tests for each operator according to test plan. Tests include small models consisting of single operator with or without combination with few other operators. More details about test plan available on Test template page
To start interacting with test sweeps framework load helper commands via
source forge/test/operators/pytorch/test_commands.sh
Available commands
| Command | Description |
|---|---|
print_help | Print commands and current query parameters. |
print_query_docs | Print docs for all available query parameters. |
print_params | Print current query parameters values. |
select_test_query | Select test_query pytest function. |
select_test_push | Select test_push pytest function. |
pytest | Run all tests or subset of test plan based on a query parameters. |
with-params pytest | Print params before and after test run. |
export_tests | Export tests from test plan to JSON file based on a query parameters. |
Full list of supported query parameters
| Parameter | Description | Supported by commands |
|---|---|---|
| OPERATORS | List of operators | test_query |
| FILTERS | List of lambda filters | test_query |
| INPUT_SOURCES | List of input sources | test_query |
| INPUT_SHAPES | List of input shapes | test_query |
| DEV_DATA_FORMATS | List of dev data formats | test_query |
| MATH_FIDELITIES | List of math fidelities | test_query |
| KWARGS | List of kwargs dictionaries. | test_query |
| FAILING_REASONS | List of failing reasons | test_query |
| SKIP_REASONS | List of skip reasons | test_query |
| RANGE | Limit number of results | test_query |
| RANDOM_SEED | Seed for random number generator | test_query |
| SAMPLE | Percentage of results to sample | test_query |
| TEST_ID | Id of a single test to run containing all test parameters | test_query |
| ID_FILES | Paths to files containing test ids instead of tests from test plan | test_query |
| ID_FILES_IGNORE | Paths to files containing test ids to be ignored | test_query |
Test configuration parameters
| Parameter | Description | Supported by commands |
|---|---|---|
| SKIP_FORGE_VERIFICATION | Skip Forge model verification including model compiling and inference | all |
To check supported values and options for each query parameter please run command print_query_docs.
Usage examples
Run all tests
with-params pytest
Run all tests for few operators
export OPERATORS=add,div
with-params pytest
Run subset of tests based on query criteria
export OPERATORS=div
export FILTERS=HAS_DATA_FORMAT,QUICK
export INPUT_SOURCES=FROM_HOST,FROM_DRAM_QUEUE
export DEV_DATA_FORMATS=Float16_b,Int8
export MATH_FIDELITIES=HiFi4,HiFi3
export KWARGS="[{'rounding_mode': 'trunc'},{'rounding_mode': 'floor'}]"
with-params pytest
Print representative tests ids of all operators with examples for kwargs values
FILTERS=UNIQUE_KWARGS with-params pytest --collect-only
Print representative tests ids of few operators
OPERATORS=add,div FILTERS=UNIQUE_KWARGS with-params pytest --collect-only
Each test can be uniquely identified via a test id. Format of test id is {operator}-{input_source}-{kwargs}-{input_shape}[-{number_of_operands)-]{dev_data_format}-{math_fidelity}.
Kwarg is a mandatory or optional attribute of an operator. See framework (PyTorch, Forge, ...) operator documentation for each operator or use filter UNIQUE_KWARGS to find examples.
Run single test based on a test id. Test id may be from a test plan or constructed custom by specifying custom values for kwargs and input_shapes.
TEST_ID='ge-FROM_HOST-None-(1, 2, 3, 4)-Float16_b-HiFi4' with-params pytest
Pytest
Pytest is a powerful testing framework for Python that simplifies writing and executing test cases. It supports features like test discovery, fixtures, parameterized testing, and detailed assertions. For more details, visit the official Pytest Documentation.
Testing with multiple input sets
The @pytest.mark.parametrize decorator allows you to run a single test function with multiple sets of inputs.
Example
@pytest.mark.parametrize("arg1, arg2, expected", [
    (1, 2, 3),
    (2, 3, 5),
    (3, 5, 8),
])
def test_addition(arg1, arg2, expected):
    assert arg1 + arg2 == expected
Explanation
- This is particularly useful for testing a function with various combinations of arguments
Marking specific parameters
You can use pytest.param to mark specific parameter combinations with additional metadata, such as expected failures (xfail).
Example
@pytest.mark.parametrize("inputs", [
    pytest.param(
        ((1, 2, 3), (4, 5, 6)), marks=pytest.mark.xfail(reason="reason"))
])
Explanation
- In this example, the first parameter combination is marked as
xfailwith a reason provided, indicating it is expected to fail. - This is useful when only some parameter sets are failing or not working correctly.
Skipping tests
Use the @pytest.mark.skip decorator to skip a test.
Example
@pytest.mark.skip(reason="Causes segmentation fault")
def test_future_feature():
    assert some_function() == "expected result"
Explanation
- Skipping tests is particularly useful when a test is causing crashes (e.g., segmentation faults) or breaking the CI pipeline.
Marking tests as expected to fail
The @pytest.mark.xfail decorator marks a test that is expected to fail.
Example
@pytest.mark.xfail(reason="Known bug in version 1.2.3")
def test_known_bug():
    assert buggy_function() == "expected"
Explanation
- If the test passes unexpectedly, pytest will flag it as
XPASS. - If the test
XPASS, it indicates an unexpected pass and will be reported as an error. - This is helpful when we need a reminder that a particular test is passing, especially in cases where it previously failed and we want to review all related instances or areas that experienced issues.
Avoid adding decorators inside tests
Example
@pytest.mark.parametrize("model_path", ["<path>/model_path1", "<path>/model_path2"])
def test_model(model_path):
    if model_path == "<path>/model_path1":
        pytest.xfail("reason")
Explanation
- In this example, one of the models fails a test. Using an
ifstatement to applyxfailis problematic because it will always mark the test as failing, even if it passes. - Instead, use
pytest.paramto explicitly define expected outcomes as shown in the recommended approach above. This ensures more accurate and reliable test behavior.
Running Performance Benchmark Tests
You can use forge/test/benchmark/benchmark.py to run performance benchmark tests:
python forge/test/benchmark/benchmark.py [options]
Available Options:
| Option | Short | Type | Default | Description |
|---|---|---|---|---|
--model | -m | string | required | Model to benchmark (e.g. bert, mnist_linear). The test file name without .py extension |
--config | -c | string | None | Model configuration to benchmark (e.g. tiny, base, large) |
--training | -t | flag | False | Benchmark training mode |
--batch_size | -bs | integer | 1 | Batch size, number of samples to process at once |
--loop_count | -lp | integer | 1 | Number of times to run the benchmark |
--input_size | -isz | integer | None | Input size of the input sample (if model supports variable input size) |
--hidden_size | -hs | integer | None | Hidden layer size (if model supports variable hidden size) |
--output | -o | string | None | Output JSON file to write results to. Results will be appended if file exists |
--task | -ts | string | "na" | Task to benchmark (e.g. classification, segmentation) |
--data_format | -df | string | "float32" | Data format (e.g. float32, bfloat16) |
Example:
python forge/test/benchmark/benchmark.py -m mobilenetv2_basic -ts classification -bs 8 -df bfloat16 -lp 32 -o forge-fe-benchmark-e2e-mobilenetv2_basic.json
Alternatively, you can run specific model tests using pytest:
pytest [model_path]
Example:
pytest -svv forge/test/benchmark/benchmark/models/yolo_v8.py
Tools
This page covers setup of various tools that can help you with development of TT-Forge-FE. The sections include:
- Pre-commit
- mdbook
- Cross Correlate Models and Ops and Export Model Variants Unique Op Configuration
- Usage
Pre-commit
TT-Forge-FE defines various pre-commit hooks that check the code for formatting, licensing issues, etc.
To install pre-commit, run the following command:
source env/activate
pip install pre-commit
After installing pre-commit, you can install the hooks by running:
pre-commit install
Now, each time you run git commit the pre-commit hooks (checks) will be executed.
If you already committed before installing the pre-commit hooks, you can run it on all files to catch up:
pre-commit run --all-files
For more information visit pre-commit.
mdbook
TT-Forge-FE uses mdbook to generate the documentation. To install mdbook on Ubuntu, run the following commands:
sudo apt install cargo
cargo install mdbook
NOTE: If you do not want to install
mdbookvia cargo (Rust package manager), consult the Official mdbook Installation Guide.
Gather Unique Ops Configuration
The model's unique ops configuration can be gathered, and the results can be printed to the console and saved as a CSV or XLSX file.
-
FORGE_EXTRACT_UNIQUE_OP_CONFIG_AT
-
By setting this flag to one of the following options, the model's unique ops configuration can be extracted at a specific compilation stage or across all stages:
-
FORGE_EXTRACT_UNIQUE_OP_CONFIG_AT = ALLExtracts all the unique ops configurations present in the graph at every compilation stage. -
FORGE_EXTRACT_UNIQUE_OP_CONFIG_AT = {GENERATE_INITIAL_GRAPH / POST_INITIAL_GRAPH_PASS / OPTIMIZED_GRAPH / AUTOGRAD / POST_AUTOGRAD_PASS / PRE_LOWERING_GRAPH}Extracts the unique ops configuration only at the specified compilation stage.
-
-
-
FORGE_PRINT_UNIQUE_OP_CONFIG
- By setting this flag to
1, all unique configurations will be printed to the console.
- By setting this flag to
-
FORGE_EXPORT_UNIQUE_OP_CONFIG_FILE_TYPE
- By setting this flag to
csvorxlsx, all unique configurations will be exported as CSV or XLSX file. The file can be saved to the default path (for example, the current directory), or it can be saved to a specific path by setting theFORGE_EXPORT_UNIQUE_OP_CONFIG_DIR_PATHenvironment variable.
- By setting this flag to
-
FORGE_EXPORT_UNIQUE_OP_CONFIG_CSV_DELIMITER
- The delimiter for the csv file can be set by using this flag. Default delimiter : slash (i.e
/)
- The delimiter for the csv file can be set by using this flag. Default delimiter : slash (i.e
Note: The delimiter used in the CSV file will be a slash (
/) to avoid potential parsing issues. Commas (,) and hyphen (-) may appear in the op shapes and attributes, which could lead to misinterpretation of the data.
Cross Correlate Models and Ops and Export Model Variants Unique Op Configuration
The models and ops can be cross-correlated and model variants unique op configuration are exported as an XLSX file by running the scripts/export_models_ops_correlation.py Python script.
The script performs the following tasks:
- Run all models until the compile depth specified by the user.
- Export unique op requirements to a file (each model variants has its own directory, in that directory each compile depth has its own file).
- Parse those unique op requirements and create a XLSX file that can be loaded into a google sheet.
- The XLSX file will contain list of models on X axis (i.e. columns) and list of ops on Y axis (i.e. rows/indices).
- Elements in between will contain a checkmark if the desired op from the Y axis (i.e., rows/indices) exists in the model on X axis (i.e., columns).
- Models will be sorted alphabetically.
- Ops will be sorted by the number of occurrences in the models.
Usage
To run the script, use the following command:
python scripts/export_models_ops_correlation.py
Required Options:
| Option | Description |
|---|---|
-c, --compile_depth (GENERATE_INITIAL_GRAPH, PRE_LOWERING_PASS, etc.) | Choose the compilation depth for extracting ops configuration for the models present in pytest_directory_path. |
-i, --pytest_directory_path | Specify the directory path containing models to test. |
Optional Options:
| Option | Description |
|---|---|
--cross_correlation_output_file_name | Specify the output XLSX file name for saving the cross correlation data between model variants and unique ops. |
--models_unique_op_configs_output_file_name | Specify the output XLSX file name for saving the Models unique op configurations. |
-o, --output_directory_path | Specify the output directory path for saving the XLSX/CSV file. |
--export_unique_op_config_file_type (CSV, XLSX) | Specify the export unique op configuration file type |
Example:
python scripts/export_models_ops_correlation.py --compile_depth GENERATE_INITIAL_GRAPH --pytest_directory_path forge/test/model_demos/high_prio/nlp/pytorch
How to run standalone MLIR, based on generated Forge-FE MLIR graphs
-
Change Directory to tt-mlir repo in tt-forge-fe third parties
$ cd tt-forge-fe/third_party/tt-mlir -
Build TTRT (once) - (Inside tt-mlir repo)
$ pip install patchelf $ cmake --build build -- ttrt -
Save system descriptor artifacts file. For more info, refer ttrt docs
$ ttrt query --save-artifacts -
Convert TTIR MLIR to TTNN MLIR
-
Save ttir mlir from logs in <some_name>_ttir.mlir . Ex: softmax_check_ttir.mlir
-
The first line of TTIR MLIR should be like below.
module attributes {} {Ex. softmax_check_ttir.mlir
module attributes {} { func.func @forward(%arg0: tensor<13x89x3xf32> {ttir.name = "x"}, %arg1: tensor<13x89x3xf32> {ttir.name = "y"}, %arg2: tensor<1x89x3xf32> {ttir.name = "input_0_multiply_1"}, %arg3: tensor<1x89x3xf32> {ttir.name = "input_0_reciprocal_0"}) -> (tensor<13x89x3xf32> {ttir.name = "ModelConstEvalPass.output_add_3"}) { %0 = tensor.empty() : tensor<1x89x3xf32> %1 = "ttir.reciprocal"(%arg3, %0) : (tensor<1x89x3xf32>, tensor<1x89x3xf32>) -> tensor<1x89x3xf32> %2 = tensor.empty() : tensor<1x89x3xf32> %3 = "ttir.multiply"(%arg2, %1, %2) : (tensor<1x89x3xf32>, tensor<1x89x3xf32>, tensor<1x89x3xf32>) -> tensor<1x89x3xf32> %4 = tensor.empty() : tensor<13x89x3xf32> %5 = "ttir.add"(%arg0, %arg1, %4) : (tensor<13x89x3xf32>, tensor<13x89x3xf32>, tensor<13x89x3xf32>) -> tensor<13x89x3xf32> %6 = tensor.empty() : tensor<13x89x3xf32> %7 = "ttir.add"(%3, %5, %6) : (tensor<1x89x3xf32>, tensor<13x89x3xf32>, tensor<13x89x3xf32>) -> tensor<13x89x3xf32> return %7 : tensor<13x89x3xf32> } } -
Generate TTNN MLIR from TTIR MLIR
- Replace path to
system_desc.ttsysto your corresponding path.
$ ./build/bin/ttmlir-opt --ttir-load-system-desc="path=/proj_sw/user_dev/akannan/forge/tt-forge-fe/third_party/tt-mlir/ttrt-artifacts/system_desc.ttsys" --ttir-to-ttnn-backend-pipeline softmax_check_ttir.mlir -o softmax_check_ttnn.mlir - Replace path to
-
-
Create Flatbuffers Serialized Binary
- Generate flatbuffer binary from TTNN MLIR
$ ./build/bin/ttmlir-translate --ttnn-to-flatbuffer softmax_check_ttnn.mlir -o softmax_check.ttnn
- Generate flatbuffer binary from TTNN MLIR
-
Run TTNN Binary
$ ttrt run softmax_check.ttnn
Verification
General Overview
When comparing our compiled model with the framework model (e.g., PyTorch model running on host), we aim to verify whether the output from the compiled model is sufficiently similar to the output from the framework model (where required degree of similarity is configurable).
So generally we want to perform the following steps:
- Create a framework model.
- Run a forward pass through the framework model.
- Compile the framework model using
Forge. - Run a forward pass through the compiled model.
- Compare the outputs.
Most of the above steps verify() function does for us:
- Handles forward passes for both framework and compiled models
- Compares results using a combination of comparison methods
- Supports customization through the
VerifyConfigclass.
Example of usage
def test_add():

	class Add(nn.Module):
		def __init__(self):
			super().__init__()

		def forward(self, a, b):
			return a + b


	inputs = [torch.rand(2, 32, 32), torch.rand(2, 32, 32)]

	framework_model = Add()
	compiled_model = forge.compile(framework_model, sample_inputs=inputs)

	verify(inputs, framework_model, compiled_model)
Notes:
- If you only want to compile model and perform forward pass without comparing outputs you can just:
framework_model = Add()
compiled_model = forge.compile(framework_model, sample_inputs=inputs)

fw_out = framework_model(*inputs)
co_out = compiled_model(*inputs)
Verify Config Overview
If VerifyConfig isn't passed as a param, default one will be used. Currently through VerifyConfig you can disable/enable:
| Feature | Name | Enabled (default) |
|---|---|---|
| Verification as a method | enabled | True |
| Number of output tensors check | verify_size | True |
| Output tensor data type check | verify_dtype | True |
| Output tensor shape check | verify_shape | True |
For more information about VerifyConfig you can check forge/forge/verify/config.py.
Example of usage
framework_model = Add()
compiled_model = forge.compile(framework_model, sample_inputs=inputs)

verify(inputs, framework_model, compiled_model, VerifyConfig(verify_dtype=False))
Besides that, config also includes value checker. There are 3 types of checker:
AutomaticValueChecker(default)AllCloseValueCheckerFullValueChecker
For more information about Checkers you can look at forge/forge/verify/value_checkers.py.

AutomaticValueChecker
This checker performs tensor checks based on the shape and type of tensor (e.g. for scalars it will perform torch.allclose as pcc shouldn't be applied to the scalars)
For this checker you can set:
pccrtolatoldissimilarity_threshold
Example of usage:
# default behavior
verify(inputs, framework_model, compiled_model)
# this will result same as the default behavior
verify(inputs, framework_model, compiled_model, VerifyConfig(value_checker=AutomaticValueChecker())
# setting pcc and rtol
verify(inputs, framework_model, compiled_model, VerifyConfig(value_checker=AutomaticValueChecker(pcc=0.95, rtol=1e-03)))
AllCloseValueChecker
This checker checks tensors using torch.allclose method.
For this checker you can set:
rtolatol
Example of usage:
# setting allclose checker with default values
verify(inputs, framework_model, compiled_model, VerifyConfig(value_checker=AllCloseValueChecker()))
# setting allclose checker with custom values
verify(inputs, framework_model, compiled_model, VerifyConfig(value_checker=AllCloseValueChecker(rtol=1e-03)))
FullValueChecker
This checker is combination of AutomaticValueChecker and AllCloseValueChecker.
For this checker you can set:
pccrtolatoldissimilarity_threshold
Examples of usage:
# setting full checker with default values
verify(inputs, framework_model, compiled_model, VerifyConfig(value_checker=FullValueChecker())
# setting full checker with custom values
verify(inputs, framework_model, compiled_model, VerifyConfig(value_checker=FullValueChecker(pcc=0.95, rtol=1e-03)))