Image Generation with Stable Diffusion XL
Generate images on your Tenstorrent hardware using Stable Diffusion XL Base - turn text prompts into high-resolution images powered by your hardware!
What is Stable Diffusion XL?
Stable Diffusion XL Base is a powerful text-to-image diffusion model that generates high-quality 1024x1024 images from text descriptions. SDXL uses a two-stage architecture with dual text encoders (CLIP-L and OpenCLIP-G) for improved prompt understanding.
Why Image Generation on Tenstorrent?
- 🎨 Native TT Acceleration - Runs directly on Tenstorrent hardware using TT-Metalium™
- 🔒 Privacy - Your prompts and images stay private
- ⚡ High Resolution - Generate 1024x1024 images (vs 512x512 in older models)
- 🎓 Production Ready - Real hardware acceleration, not CPU fallback
Journey So Far
- Lesson 3: Text generation with Llama
- Lesson 4-5: Chat and API servers
- Lesson 6-7: Production deployment with vLLM
- Lesson 8: Image generation ← You are here
Architecture
Stable Diffusion XL uses a two-stage architecture with dual text encoders:
┌──────────────────────────────────────┐
│     Text Prompt                      │
│  "If Tenstorrent were a company      │
│   in the 1960s and 1970s"            │
└─────────────┬────────────────────────┘
              │
              ▼
     ┌────────────────────────────┐
     │ Dual Text Encoders:        │
     │ • CLIP-L (OpenAI)          │ ← Encode text to embeddings
     │ • OpenCLIP-G (laion)       │   (pooled + sequence)
     └────────┬───────────────────┘
              │
              ▼
     ┌────────────────────────────┐
     │ UNet Diffusion Model       │ ← Generate latent representation
     │ Running on TT Hardware     │    (28-50 denoising steps)
     │ Cross-attention layers     │
     └────────┬───────────────────┘
              │
              ▼
     ┌────────────────┐
     │ VAE Decoder    │ ← Convert latents to 1024x1024 pixels
     └────────┬───────┘
              │
              ▼
     ┌────────────────┐
     │ Generated      │
     │ Image (PNG)    │
     └────────────────┘
Hardware Compatibility
Stable Diffusion XL Base runs on Tenstorrent hardware with native TT-NN™ acceleration (not CPU fallback!):
| Hardware | Status | Performance | Notes |
|---|---|---|---|
| n150 (Wormhole™) | ✅ Supported | ~12-15 sec/image | Optimized single-chip config |
| n300 (Wormhole) | ✅ Supported | ~8-10 sec/image | Faster with 2 chips |
| p100 (Blackhole®) | ⚠️ Experimental | ~12-15 sec/image | Same Blackhole arch as p300c |
| p300c (Blackhole) | ⚠️ Experimental | ~12-15 sec/image | Single Blackhole chip; use MESH_DEVICE=P100 |
| T3000 (Wormhole) | ✅ Supported | ~5-8 sec/image | Production scale (8 chips) |
All hardware benefits from native TT-NN acceleration! The model runs directly on Tensix cores using hardware-specific operators.
Check Your Hardware
Quick Check: Not sure which hardware you have?
tt-smi
Look for the "Board Type" field in the output (e.g., n150, n300, T3000, p100).
Prerequisites
- TT-Metalium installed and working (completed Lesson 2)
- Hugging Face account (for automatic model download)
- Tenstorrent hardware (see compatibility table above)
- ~10-15 GB disk space for model weights
Model: Stable Diffusion XL Base
We'll use Stable Diffusion XL Base 1.0 which runs natively on Tenstorrent hardware using TT-Metalium.
Model Details:
- HuggingFace Model:
stabilityai/stable-diffusion-xl-base-1.0 - Size: ~10 GB
- Resolution: 1024x1024 images (high quality!)
- Speed: ~12-15 seconds per image on n150 (varies by hardware)
- Architecture: UNet with dual text encoders (CLIP-L + OpenCLIP-G)
- Inference Steps: 28-50 (configurable)
- Hardware: Runs on TT-NN operators (native acceleration)
✨ v0.65.1 Improvements:
- Faster VAE decoding - Optimized latent-to-pixel conversion
- Better encoder performance - Dual text encoders run more efficiently
- Combined base+refiner - New two-stage pipeline for best quality
- These improvements make SDXL even faster and better on your hardware!
💡 Lighter Alternative: For faster iteration or testing, Stable Diffusion v1.4 is also available (models/demos/wormhole/stable_diffusion/) and generates 512×512 images in ~8-10 seconds on n150. Great for development!
Step 1: Authenticate with Hugging Face
The model will be automatically downloaded from Hugging Face the first time you run it. Login to enable downloading:
hf auth login --token "$HF_TOKEN"
hf auth login --token "$HF_TOKEN"
Note: SDXL Base 1.0 is publicly available and doesn't require special access permissions.
Step 2: Configure for Your Hardware
Set the appropriate mesh device environment variable for your hardware:
🔧 n150 (Wormhole - Single Chip) - Most common
export MESH_DEVICE=N150
Performance: ~12-15 seconds per 1024x1024 image
🔧 n300 (Wormhole - Dual Chip)
export MESH_DEVICE=N300
Performance: ~8-10 seconds per 1024x1024 image (faster with 2 chips!)
🔧 T3000 (Wormhole - 8 Chips)
export MESH_DEVICE=T3K
Performance: ~5-8 seconds per 1024x1024 image (production speed!)
🔧 p100 (Blackhole - Single Chip)
export MESH_DEVICE=P100
export TT_METAL_ARCH_NAME=blackhole  # Required for Blackhole
Performance: ~12-15 seconds per 1024x1024 image (similar to n150)
⚠️ Note: Blackhole SDXL support is experimental. Please report any issues!
🔧 p300c (Blackhole - Single Chip / TT-QuietBox® 2)
export MESH_DEVICE=P100          # p300c runs in single-chip P100 mode
export TT_METAL_ARCH_NAME=blackhole
Performance: ~12-15 seconds per 1024x1024 image
p300c is a single Blackhole chip — identical instruction set to p100.
Use MESH_DEVICE=P100 for all single-chip Blackhole lessons.
TT-QuietBox 2 note: TT-QuietBox 2 ships without ~/tt-metal. You must clone and build
TT-Metalium from source before running SDXL. See
Build TT-Metalium from Source.
⚠️ Note: Blackhole SDXL support is experimental. Please report any issues!
What this does:
- Tells TT-Metalium to configure for your specific hardware
- Optimizes model parallelization for your chip count
- Enables appropriate memory management
Step 3: Generate Your First Image
Run the Stable Diffusion XL demo with a sample prompt (using the MESH_DEVICE you set in Step 2):
mkdir -p ~/tt-scratchpad
cd ~/tt-scratchpad
export PYTHONPATH=~/tt-metal:$PYTHONPATH
# Use the MESH_DEVICE you set in Step 2 (N150, N300, T3K, or P100)

# Run with default prompt
pytest ~/tt-metal/models/experimental/stable_diffusion_xl_base/demo/demo.py
🎨 Generate Sample Image
What you'll see:
Loading Stable Diffusion XL Base from stabilityai...
✓ Model loaded from stabilityai/stable-diffusion-xl-base-1.0
✓ Initializing UNet on TT hardware
✓ Encoders loaded (CLIP-L + OpenCLIP-G)

Generating 1024x1024 image (28-50 inference steps)...
Processing... (first generation takes longer - model compilation + warmup)
Decoding with VAE...

✓ Image generation complete!
✓ Image saved to: output directory
Generation time: [varies by hardware - see Step 2 performance notes]
The generated image will be saved according to the test configuration.
Step 5: Interactive Mode - Try Your Own Prompts
Run in interactive mode to generate multiple images with custom prompts (using your MESH_DEVICE from Step 3):
mkdir -p ~/tt-scratchpad
cd ~/tt-scratchpad
export PYTHONPATH=~/tt-metal:$PYTHONPATH
# Use the MESH_DEVICE you set in Step 3

# Run interactive mode
pytest ~/tt-metal/models/experimental/stable_diffusion_xl_base/demo.py
Note: The current demo.py uses pytest configuration. For a more interactive experience, see the "Create Your Own Demo" section below.
Example prompts to try:
Literary & Cultural References
- Steinbeck's Computing Dust Bowl:
"The Grapes of Wrath reimagined as 1970s computer lab, orange terminals, dusty atmosphere, vintage photograph, film grain"
- Kerouac's Electric Highway:
"On the Road meets Silicon Valley, beat generation aesthetic, vintage mainframe computers, dharma bums coding, 1960s photography"
- Gertrude Stein's Repetition Machine:
"A rose is a rose is a processor, cubist computing, abstract geometric circuit boards, modernist aesthetic, orange and purple"
- Whole Earth Catalog Computer Lab:
"1970s alternative technology workshop, homebrew computer club, Stewart Brand aesthetic, orange and brown, democratic tools, vintage catalog photography"
Classic Movie Computing Quotes
- Chocolate-Powered AI:
"What would a computer do with a lifetime supply of chocolate? Willy Wonka meets mainframe, whimsical vintage computing, 1970s aesthetic, orange accents"
- WarGames WOPR:
"Would you like to play a game? Cold War computing aesthetic, NORAD command center, green phosphor terminals, dramatic lighting, 1980s photography"
Decidedly Tenstorrent
- Tensix Mandelbrot Dreams:
"880 RISC-V cores dreaming of fractals, purple and orange silicon wafer, crystalline structure, technical diagram meets abstract art"
- Orange Silicon Valley:
"AI accelerator as California poppy field, orange blooms, Tenstorrent hardware, golden hour lighting, Stanford Foothills, technical beauty"
- Network-on-Chip Landscape:
"NoC topology as ancient trade routes, silicon pathways, orange and purple, cartography meets chip design, vintage map aesthetic"
- The Tensor Processing Saloon:
"Wild West saloon but it's a 1970s computer lab, orange terminals, cowboys coding RISC-V assembly, vintage Americana, film photograph"
Example Output
Here's what you can create with Stable Diffusion XL on Tenstorrent hardware:
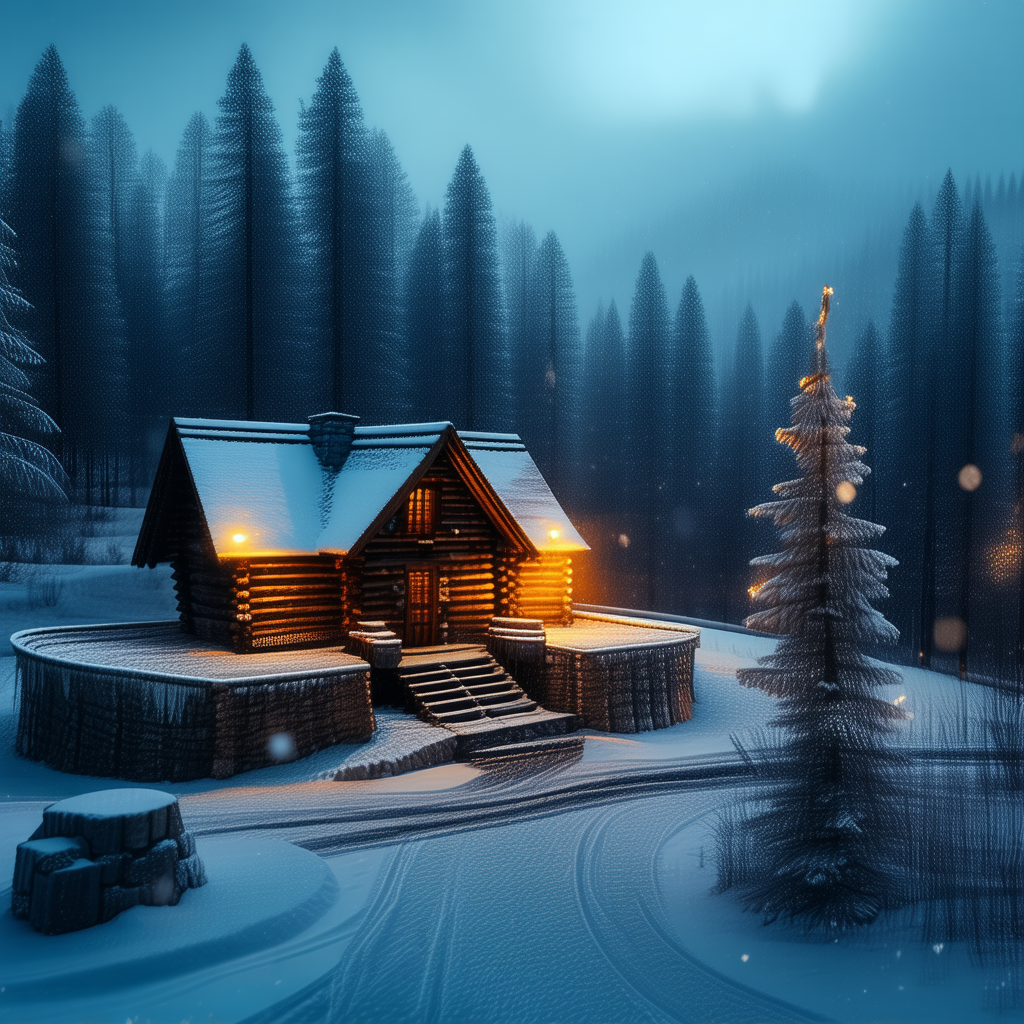
Generated with prompt: "A cozy cabin in a snowy forest, warm lights in windows, winter evening, oil painting style"
Generation details:
- Resolution: 1024x1024
- Steps: 28
- Hardware: n150 (single Wormhole chip)
- Time: ~2-3 minutes (first run includes model load)
Step 5: Create Your Own Interactive Demo (Advanced)
Want a simpler, more interactive experience? The pytest-based demo is powerful but complex. You can create a simplified demo script:
# ~/tt-scratchpad/simple_sdxl_demo.py
import ttnn
from diffusers import DiffusionPipeline
import torch

# Load model
pipeline = DiffusionPipeline.from_pretrained(
    "stabilityai/stable-diffusion-xl-base-1.0",
    torch_dtype=torch.float32,
    use_safetensors=True
)

# Generate image
prompt = input("Enter your prompt: ")
image = pipeline(
    prompt=prompt,
    num_inference_steps=28,
    guidance_scale=7.5
).images[0]

# Save
output_path = f"sdxl_output.png"
image.save(output_path)
print(f"✅ Image saved to: {output_path}")
This is a simpler starting point that you can customize further!
Step 5.5: Combined Base + Refiner (NEW in v0.65.x! 🎨)
Want even BETTER image quality? SDXL has a two-stage architecture: Base generates the image, Refiner enhances it!
The combined pipeline runs both stages automatically:
cd ~/tt-scratchpad
export PYTHONPATH=~/tt-metal:$PYTHONPATH
# Use your MESH_DEVICE from Step 2

# Run combined base + refiner pipeline
pytest ~/tt-metal/models/experimental/stable_diffusion_xl_base/demo/demo_base_and_refiner.py
What happens:
- Base model generates 1024x1024 image
- Refiner model enhances details, colors, and quality
- Result: Noticeably better quality than base alone!
Performance:
- Takes about 2x longer than base-only (~25-30 sec on n150)
- Worth it for final/production images
- Use base-only for quick iteration, refiner for finals
When to use combined pipeline:
- ✅ Final production images
- ✅ When quality matters most
- ✅ Professional/commercial work
- ❌ Quick experimentation (stick with base-only)
Tip: Generate with base-only while developing your prompt, then run combined pipeline on your best results!
Step 6: Experiment with Code (Advanced)
Ready to go beyond button-pressing? Copy the demo to your scratchpad and modify it:
📝 Copy Demo to Scratchpad
This copies demo.py to ~/tt-scratchpad/sdxl_demo.py and opens it for editing.
What you can experiment with:
- Batch generation with variations:
# Generate multiple images with seed variations
prompts = [
    "Whole Earth Catalog computer lab, 1970s",
    "Kerouac typing on vintage terminal, beat aesthetic",
    "Would you like to play a game? WOPR terminal"
]

for i, prompt in enumerate(prompts):
    image = pipe(
        prompt=prompt,
        num_inference_steps=28,
        guidance_scale=3.5,
        seed=i  # Different seed for each
    )
    image.save(f"tenstorrent_{i:03d}.png")
- Parameter exploration:
# Try different guidance scales to see impact on adherence to prompt
for scale in [2.0, 3.5, 5.0, 7.5]:
    image = pipe(
        prompt="Tenstorrent headquarters, orange architecture",
        guidance_scale=scale
    )
    image.save(f"guidance_{scale}.png")
- Prompt interpolation:
# Blend between two concepts
prompts = [
    "1960s mainframe computer room",
    "futuristic AI accelerator lab"
]
# Generate with weighted combination
- Custom resolution experiments:
# Try different aspect ratios (must be multiples of 64)
image = pipe(
    prompt="Wide cinematic shot of vintage computing",
    width=1536,  # 16:9 aspect ratio
    height=864
)
Tips for code experiments:
- Model stays loaded between generations (fast iterations!)
- Save images with descriptive names:
prompt_seed_guidance.png - Keep
num_inference_steps=28(optimized for SDXL) - Experiment with
guidance_scalebetween 2.0-7.5 - Use seeds for reproducibility (same seed = same image)
Make it your own! The demo is just a starting point - modify, extend, and create your own image generation workflows.
Understanding the Generation Process
Diffusion Process in SDXL:
- Text Encoding - Dual encoders (CLIP-L + OpenCLIP-G) process your prompt into embeddings
- Start with noise - Begin with random latent representation in 128x128 latent space
- Denoise iteratively - UNet removes noise in 28-50 steps guided by text embeddings
- Each step runs on TT hardware - Native TT-NN acceleration on Tensix cores
- VAE Decoding - Convert 128x128 latents to 1024x1024 pixel image (8x upscaling)
Key Parameters:
num_inference_steps (28-50)
- Number of denoising steps
- 28: Faster generation (~12-15 sec)
- 50: Higher quality but slower (~20-25 sec)
- Configurable via pytest parameters
guidance_scale (7.5)
- How closely to follow your prompt
- 7.5: Standard default for SDXL Base
- Higher values = more literal interpretation
- Lower values = more creative freedom
image_w, image_h (1024x1024)
- High resolution output
- Can be adjusted but 1024x1024 is optimal for SDXL
seed (0)
- Random seed for reproducibility
- Same seed + same prompt = same image
- Useful for iterating on prompts
Prompt Engineering Tips
Good prompts include:
- Subject - What you want to see
- Style - Art style, photography type
- Colors - Color scheme
- Lighting - Lighting conditions
- Details - Specific details to include
Example:
"Vintage 1970s office, orange and brown color scheme, retro computers,
warm lighting, film photograph, detailed, high quality"
Keywords that work well:
- Art styles:
photorealistic,digital art,oil painting,sketch - Quality:
detailed,high quality,8k,professional - Lighting:
studio lighting,natural light,dramatic lighting - Camera:
35mm photograph,wide angle,close-up
Performance Optimization
For faster generation on n150:
- Reduce steps:
--steps 30 # Instead of 50
2. **Lower resolution:**
   ```bash
   --width 256 --height 256  # Instead of 512x512
- Use attention slicing: The script automatically enables this for n150 to reduce memory usage
Comparing Generation Speed
| Hardware | Steps | Time | Notes |
|---|---|---|---|
| CPU Only | 50 | ~5-10 min | Very slow |
| n150 | 50 | ~15-30 sec | Accelerated |
| n300 | 50 | ~10-20 sec | Faster (2 chips) |
| High-end GPU | 50 | ~5-10 sec | Comparison |
Troubleshooting
Device reset between models (optional):
If you experience issues after running other models (like Llama from earlier lessons), you can reset the device:
tt-smi -r
This clears device state and memory. Usually not needed between pytest demos, but useful if:
- Previous demo crashed or hung
- You see "out of memory" or device errors
- Device behaves unexpectedly
- Switching between very different workloads
Most pytest tests automatically clean up the device, so this is only needed if something went wrong.
Model download fails:
# Check Hugging Face authentication
hf auth whoami

# SDXL Base 1.0 is publicly available - no special access needed
# Visit: https://huggingface.co/stabilityai/stable-diffusion-xl-base-1.0
Slow first generation:
- First run downloads the model (~10 GB) which takes 5-10 minutes
- First generation loads model into device (2-5 min)
- Subsequent generations are much faster (~12-15 sec)
- This is normal behavior
Device hangs or crashes:
# Reset the device
tt-smi -r

# If that doesn't work, clear device state completely
sudo rm -rf /dev/shm/tenstorrent* /dev/shm/tt_*
tt-smi -r
What You Learned
- ✅ How to set up Stable Diffusion on Tenstorrent hardware
- ✅ Text-to-image generation with custom prompts
- ✅ Understanding diffusion model parameters
- ✅ Prompt engineering for better results
- ✅ Batch generation and optimization
Key takeaway: You can generate high-quality images locally on your Tenstorrent hardware, with full control over the generation process and complete privacy.
Next Steps
Experiment with:
- Different prompts - Try various subjects and styles
- Parameter tuning - Adjust steps, guidance_scale, and seed
- Batch generation - Create variations of successful prompts
- Image-to-image - Use generated images as starting points (advanced)
Advanced topics:
- Fine-tuning Stable Diffusion on custom images
- Inpainting (editing parts of images)
- ControlNet for precise control
- Integrating with web interfaces
Resources
- Stable Diffusion: stability.ai
- Hugging Face Diffusers: huggingface.co/docs/diffusers
- Prompt Engineering Guide: prompthero.com
- TT-Metalium Docs: docs.tenstorrent.com
Happy generating! 🎨